Saturday, December 22, 2007

Crab Dip

Tis the season for many holiday parties and gatherings. If you need a quick and yummy appetizer to take with you, this dip is it! I took it to a party last night and it was a big hit. This recipe comes from the cookbook Betty Crocker’s Entertaining Basics.

Hot Crab Dip
Makes 2 ½ cups

4 medium green onions
1 clove garlic
1 package (8 oz) cream cheese at room temperature
¼ cup grated Parmesan cheese
¼ cup mayonnaise or salad dressing
¼ cup dry white wine or apple juice
2 teaspoons sugar
1 teaspoon ground mustard
1 can (6 oz) crabmeat
1/3 cup sliced almonds
Assorted crackers or sliced raw vegetables

Preheat the oven to 375 degrees F. Cut and discard the tips of the green onions with the stringy end. Cut green onions into thin slices, including some of the green part. Peel and finely chop garlic.

Mix the onions, garlic, cream cheese, Parmesan cheese, mayonnaise, wine, sugar and mustard in a medium bowl.

Drain the crabmeat. Flake crabmeat with a fork, and remove any tiny pieces of shell. Stir the crabmeat into the cheese mixture. Spread the cheese and crab mixture into a 9 inch pie plate or casserole dish. Sprinkle with sliced almonds.

Bake uncovered 15-20 minutes or until hot and bubbly. Serve with crackers or vegetables. I like Ritz crackers the best!

Monday, December 17, 2007

Red Velvety Goodness

Red velvet cake has always been somewhat of a mystery to me. What is it exactly? Is it chocolate? Is it vanilla? My friend Kelly and I used to work together and we would frequent a restaurant that had the best red velvet cake. She knew the manager so we would often partake of FREE red velvet cake (the best kind).

I’ve never made red velvet cake before. I take that back. I once made it from a mix so that doesn’t count. A couple at my work is getting married soon and our department threw a luncheon for them last week. Being the cupcake fanatic that I am, I decided to make red velvet cupcakes for the luncheon. Being red and all they were very festive (not to mention delicious!).

I used Paula Deen’s recipe from the Food Network for the cupcakes. I did not use her cream cheese frosting recipe; I used the one I previously posted that topped my pumpkin ginger cupcakes.

Red Velvet Cupcakes
Makes 24 cupcakes

2 ½ cups all purpose flour
1 ½ cups sugar
1 teaspoon baking soda
1 teaspoon salt
1 teaspoon cocoa powder
1 ½ cups vegetable oil
1 cup buttermilk, room temperature
2 large eggs, room temperature
2 tablespoons red food coloring
1 teaspoon white distilled vinegar
1 teaspoon vanilla extract

Preheat oven to 350 degrees F. Line pans with muffin liners.

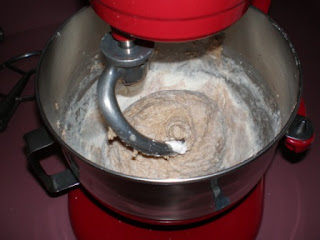
In a medium mixing bowl, sift together flour, sugar, baking soda, salt, and cocoa powder. In a large bowl gently beat together the oil, buttermilk, eggs, food coloring, vinegar, and vanilla with a mixer (handheld or stand). Add the sifted dry ingredients to the wet and mix until smooth and thoroughly combined. The batter matches my mixer!


Divide the batter evenly among the cupcake tins, about 2/3 filled. Bake in oven for 20-22 minutes, turning pans once half way through. Test cupcakes with a toothpick for doneness. Remove from oven and cool completely before frosting.

Frost with cream cheese frosting. If you like a lot of frosting, I suggest making a double batch. A single batch will get the job done in a pinch, but the extra frosting makes them taste THAT much better. Then garnish with chopped nuts or toasted coconut if desired. I left mine plain.


So is it worth it? All I can say is, oh my goodness. These were the best cupcakes I have ever made completely and totally from scratch. They had a beautiful red color and the frosting was whipped to perfection. This frosting recipe is seriously my favorite now. I didn’t get to bring any of them back home from work so that’s a good sign that they were good.

The recipe was very simple. Mix dry, mix wet, mix them together, pour in pan and bake. I do better with these types of recipes rather than the standard cake batter recipe that requires creaming the butter and sugar together. These would be perfect to take to a holiday party. I love cupcakes because they are already packaged in individual servings. No messy cake cutting necessary. People can just pick them up and eat them, even without a fork or a plate.

I will be adding this recipe to my arsenal. I’m already planning on making it again this weekend for some friends, including my friend Kelly. As the red velvet cake expert I’ll let her be the judge.

Thursday, December 13, 2007

Basic White Bread


Bread. A staple in almost every kitchen. At first look, homemade bread may seem complex, but it’s actually a lot easier than you think. This is only the third time I've ever made homemade bread (not using a breadmaker). Below is a recipe for basic white bread from the book Baking with Julia by Dorie Greenspan.

White Loaves
Makes 2 loaves

2 ½ cups warm water (105 – 115 degrees F)
1 tablespoon active dry yeast
1 tablespoon sugar
7 cups (approximately) bread flour or unbleached all-purpose flour
1 tablespoon salt
½ stick (2 oz) unsalted butter, at room temperature

Recipe says: Pour ½ cup of the water into the bowl of a heavy-duty mixer. Sprinkle yeast and sugar over the top and whisk to blend. Allow mixture to rest until the yeast is creamy, about five minutes.


Add remaining two cups water and about 3 ½ cups flour to the yeast. Snap bowl into mixer and attach dough hook. Mix on low speed to get the dough going a bit. Add remaining 3 ½ cups flour. Increase mixer speed to medium and beat, stopping to scrape down the bowl and hook as needed, until the dough comes together. If dough does not come together, add a bit more flour, a tablespoon at a time. Add the salt and continue to beat and knead at medium speed for about 10 minutes, until the dough is smooth and elastic.


I say: Easy as pie as long as you have a mixer. The dough came together beautifully and I didn’t have to do much except throw stuff in the mixer and turn it on.

Recipe says: When the dough is thoroughly mixed, add the butter, a tablespoon at a time, and beat until incorporated. Don’t be disconcerted if your beautiful dough comes apart with the addition of the butter – beating will bring it back together.

I say: Well I was disconcerted with the addition of the butter. My dough ball started to come apart and stick to the bowl a bit. I poked at it with my spatula and tried to make it come back together but it refused. I decided to just go with it and when I turned it out in the next step it worked out fine. Now continue…

Recipe says: Turn the dough out onto a lightly floured work surface and shape it into a ball. Place it in a large buttered or oiled bowl (one that can hold double the amount of dough). Turn the dough around to cover its entire surface with butter or oil, cover the bowl tightly with plastic wrap, and let the dough rest at room temperature until it doubles in bulk, about 45 minutes to an hour.


I say: If dough could be sexy, then this dough is sexy. It was silky smooth to the touch and formed a beautiful dough ball. It stuck a little bit to areas without flour but other than that it was great! To help the dough rise, place the bowl with the dough on top of a smaller bowl filled with hot water.


Recipe says: Butter two 8 ½ by 4 ½ inch loaf pans and set aside. Deflate the dough and turn it out onto a lightly floured work surface. Divide the dough in half and work with one piece at a time. Using the palms of your hands and fingertips, or a rolling pin, pat the dough into a large rectangle about 9 inches wide and 12 inches long with a short side facing you.


Starting at the top, fold the dough about two thirds of the way down the rectangle and then fold it down again, so that the top edge meets the bottom edge.


Turn the roll so that the seam is in the center of the rolls, facing up, and turn the ends of the roll in just enough so that it will fit in the loaf pan.


Pinch the seams to seal, turn the loaf over so that the seams are on the bottom, and plump the loaf with your palms to get an even shape. Drop the loaf into the pan, seam side down, and repeat with the other piece of dough.


Cover the loaves with oiled plastic wrap and allow them to rise in a warm place (about 80 degrees F) until they double in size again, growing over the tops of the pans, about 45 minutes.

I say: I think the shaping is the hardest part. Cookbooks never show enough pictures of this so I can see exactly how to do it. I’ve tried to take pictures (above) of what I think I’m supposed to do here so you can see.

I couldn’t quite get the bread into a perfect rectangle, but I figure it was close enough. I also only have one 8 ½ inch loaf pan and one 9 inch loaf pan. I think they look pretty good though!


Recipe says: Preheat the oven to 375 degrees F and center a rack in the oven.

When the loaves are fully risen (poke your finger in the dough and the impression should remain), bake them for 35 to 45 minutes, or until they are honey-brown and an instant-read thermometer plunged into the center of the bread (turn a loaf out and plunge the thermometer through the bottom of the bread) measures 200 degrees F. Remove the loaves from their pans as soon as they come from the oven and cool the loaves on racks. These should not be cut until they are almost completely cool; just warm is just right. Bread can be wrapped and frozen for up to a month.


I say: I don’t think I let the dough rise enough the second time around. The dough just barely reached the top of the pan on the smaller pan and didn’t even come close on the larger pan. I think it wasn’t warm enough in my kitchen. Next time I will let the dough rise longer or place each pan over a bowl of warm water like I do for the first rise.

The baking part was fine and the loaves popped right out of the pans.

Once the bread was cool I sliced one loaf and wrapped one for the freezer. The bread tastes great, even if I don’t think it rose enough. I’ve toasted two pieces for breakfast every day this week.

So is it worth it? There is nothing like the taste of homemade bread. It does not even compare to the store bought version. However homemade bread takes a long time to make. It’s not all active time; most of it is just waiting for the dough to rise or the bread to bake. It is a good activity for a Saturday or Sunday, especially now when it’s so cold outside (at least where I live).

Homemade bread is cheap to make and it’s all natural. So considering all the benefits (great taste, cheap, all natural) I think it’s worth it. I also find cooking and baking to be a relaxing activity, so for me the time is worth it too.

If you have never made homemade bread before I suggest you try it at least once. I know I was really intimidated at first but it’s not as hard as it seems. I believe it also takes practice to get it just right. With every batch you learn something new. No one can whip out a perfect loaf of bread on the first try.

Now go forth and make bread!

Wednesday, December 12, 2007

Triple Layer Fudge

I’ve been making this recipe every year at Christmas for the past five years. I absolutely love it and it always gets rave reviews everywhere I take it. I haven’t come across any other fudge like it!

The recipe comes from the cookbook “Treasury of Christmas”. I think I got it as a gift back in 2001 (?) so I’m not sure if it’s still available. Each layer of fudge is prepared separately and layered in the pan. I made this a couple of weeks ago to take to work for a coworker’s birthday.

Triple Layer Fudge
Makes a 13 x 9 pan

3 3/4 cups sugar, divided
¾ cup packed light brown sugar
3 small cans (5 oz each) evaporated milk
4 tablespoons butter, divided
¾ teaspoons salt, divided
4 ½ cups miniature marshmallows, divided
1 cup (6 oz) semisweet chocolate chips
1 cup (6 oz) white chocolate chips
½ cup creamy peanut butter
4 ½ teaspoons vanilla

First prepare a 13 x 9 pan by lining it completely with foil. This will make cutting the fudge a lot easier.


Next prepare the chocolate fudge. In a saucepan combine 1 ½ cups sugar, 1 can evaporated milk, 2 tablespoons butter and ¼ teaspoon salt.


Bring to a boil over medium heat, stirring constantly. It will take a little while to bring the mixture to a boil over medium heat. Don’t get impatient and jack up the heat to make it boil faster. Once the bubbles rise and break on the surface, boil for five minutes, stirring constantly.


Remove saucepan from heat. Stir in 1 ½ cups marshmallows until marshmallows are melted and mixture is smooth.


Add semisweet chocolate chips and 1 ½ teaspoons vanilla. Stir mixture until chocolate chips are melted and mixture is smooth.


Pour chocolate fudge into prepared pan and spread evenly with a spatula.


Immediately prepare the next layer, peanut butter fudge. In a saucepan combine ¾ cup sugar, ¾ cup brown sugar, 1 can evaporated milk and ¼ teaspoon salt. Bring to a boil over medium heat, then boil for five minutes stirring constantly (same process as for the chocolate fudge).

Remove saucepan from heat. Stir in 1 ½ cups marshmallows until melted and mixture is smooth.

Add ½ cup creamy peanut butter and 1 ½ teaspoons vanilla. Stir until mixture is smooth and combined.

Pour peanut butter fudge into prepared pan directly on top of chocolate fudge. Spread evenly with a spatula, but try not to mix with chocolate fudge.


Immediately prepare white fudge. In a saucepan combine 1 ½ cups sugar, 1 can evaporated milk, 2 tablespoons butter and ¼ teaspoon salt. Bring to a boil over medium heat, then boil for five minutes stirring constantly (again, same process as before).

Remove saucepan from heat. Stir in 1 ½ cups marshmallows until melted and mixture is smooth.

Add 1 cup white chocolate chips and 1 ½ teaspoons vanilla. Stir until mixture is smooth and combined.

Pour white fudge into prepared pan directly on top of peanut butter fudge. Spread evenly with a spatula, being careful not to mix layers.


Cover fudge and refrigerate several hours until firm. If the fudge does not seem to be firming up, put it in the freezer for awhile.

Lift fudge out of pan by grasping foil on either side of the pan. Peel foil off back of fudge and place fudge on cutting board. The slab of fudge may crack while you do this, which is okay. You can fix it/hide it when you cut it up.


Cut fudge into one inch squares. I find it easier to cut the big slab down into little slabs and then into one inch squares. To show off the layers best, don’t run the knife through the fudge. Press down with the knife to cut, then scoot the cut part away from the big part and lift the knife off. Or whatever works best for you!


When making the fudge the peanut butter layer must be in the middle. It is softer than the other two layers and is held in place by the chocolate and white layers on either side. When pouring the white fudge on top of the peanut butter, pour it all over to all parts of the pan, instead of in one big glob. That way you will have less spreading to do for the white layer and less chance of mixing it up with the peanut butter layer.

If you DO mix the layers it's not a big deal. The fudge will still taste wonderful. I just prefer to show the three distinct layers.

So is it worth it? This fudge takes a while to make and a long time to cut it up into those tiny little squares. But it tastes fantastic! Because the recipe is so involved, I usually only make this fudge once a year. I think it’s worth it for a special holiday treat. It also makes a great gift. I recommend making it to take to a party or to work or to give as gifts because it makes a LOT of fudge. It will last for several weeks in your refrigerator and is a great little snack. Or a big snack. I think I ate like 18 pieces of it today. I couldn’t help myself!

Tuesday, December 11, 2007

Afternoon Links: Cookies with...Bacon?

I came across the most interesting recipe the other day.

I have often asked this question, as many people have - is there anything that does not go well with bacon? Conversely, is there any food that is not better with bacon?

I am not a huge meat eater myself, but I do like my bacon if it is cooked just right. Never Bashful with Butter whipped up some Bacon Chocolate Chip Cookies. It does sound odd, but check it out for yourself (yes there are pictures!):

Experiments in Deliciousness: Bacon Chocolate Chip Cookies with Maple Cinnamon Glaze

I don't know if I'm daring enough to try these. :)

Sunday, December 9, 2007

Tuna Noodle Casserole

This weekend we were supposed to get mountains of ice and snow and be locked in our houses until Tuesday. I instantly had dreams of lazy days in my kitchen and ran to the store on Friday night to stock up on ingredients for the 18 recipes that popped in my head all at the same time.

Well we didn’t exactly get the wintry mix that the weather people were predicting and I didn’t exactly get around to making my 18 recipes. But I did make one of my very favorite comfort food dishes that I haven’t made in a very long time – tuna noodle casserole. This is my mother’s recipe and one of the very first dishes I learned to cook.

I don’t actually measure anything when I make this dish, so I’ve tried to estimate the measurements below.

Tuna Noodle Casserole
About 4 servings

Four servings of pasta, any kind
1 can cream of mushroom soup
¼ cup of milk or so
1-2 cups of shredded cheese, yellow or yellow/white mix
1 can tuna, drained
Potato chips or bread crumbs

A few notes about the ingredients. For the pasta I like to use bigger pasta like rotini or rigatoni. Elbows will work ok but I think they are a little too small and get lost in the sauce. As for cream of mushroom soup, it has to be Campbell’s. I have tried generic brand and it does NOT taste the same to me. Campbell’s is the creamiest. Finally for the shredded cheese you can really use any kind of yellow shredded cheese like cheddar or Colby or any kind of white and yellow cheese mix like Colby jack or a Mexican blend or Italian blend, just whatever you have on hand.

First cook the pasta according to package directions and drain. While the pasta is cooking, preheat oven to 350 degrees F. In two quart casserole dish, mix together soup and milk until blended. Then stir in a few handfuls of cheese.

Stir in tuna. Now this is a very important step as this dish is called TUNA noodle casserole. When my husband and I were first married I made this for him and accidentally left out the tuna. So it was just noodle casserole. We didn’t realize the mistake until after we sat down to eat. I ended up microwaving the forgotten tuna and then threw it on top of the casserole. Hubby thought it was hilarious and still brings it up whenever I make this dish.

Next stir in the drained pasta until well coated. If you are feeling particularly healthy you can stir in some frozen vegetables at this point, like peas or carrots. I do this sometimes but not this time.

Then sprinkle another few handfuls of cheese all over the top. On top of that sprinkle crunched up potato chips or bread crumbs. Cover and bake for 25-30 minutes or until cheese is melted and a bit bubbly.


This is a recipe from my childhood. My mom made this for us ALL the time. It is truly my comfort food.

I was actually talking to my mom the other night about this recipe and she said she always wanted to try making individual casseroles. I think next time I will try that. I will mix the casserole the same way but in a big bowl, then spoon it into four two cup pyrex bowls or casserole dishes. Then sprinkle the tops with cheese and bread crumbs and bake on a cookie sheet for 20-25 minutes.

Four individual casseroles would be awesome because we could eat two and put the other two in the refrigerator or freezer for another meal. They would already be packaged up and ready to go. I can’t wait to try it next time.

Saturday, December 8, 2007

Bachelorette Party Veil

About a month ago one of my very best friends, Jenny, got married. We’ve known each other for more than 20 years. She was maid of honor at my wedding and I was matron of honor at her wedding (matron makes me sound OLD).

Jenny’s bachelorette party was the weekend before the wedding. If you’ve ever been to a bachelorette party, you know that the bride-to-be always wears something to make her stand out in a crowd. Jenny is not the type of girl to want to go all out wearing feather boas and a tiara and a big sign that says “Last Night of Freedom!” I wanted to make her something simple, pretty and very un-tacky.

A veil.

Now if you’ve ever been a bride you know that REAL veils are ridiculously expensive. Plus we were planning a rowdy night out at a smoky bar so there was no way I was going to spend a ton of money on something that could possibly get stomped on or stained with beer.

I had an idea in my mind of what I wanted to make so on the day of the party (I’m not a procrastinator) I hoofed it on up to Wal-Mart to procure my supplies.

One yard of tulle = $1.12
One headband (about ½ inch wide) = $0.97

Total money spent = $2.09

That is all you need to make a very basic veil. Tulle comes in all sorts of colors so if your friend is not into white, make her a veil in her favorite color. Remember it’s all about the bride so think about what SHE would want, not what you want. If you want a veil then make your own. You can wear it around your house while you vacuum (actually that’s not a bad idea….).

Begin by cutting the tulle into two pieces that are a ½ yard each. They do not have to be exactly equal, but should be fairly close. You could also ask the fabric person at the store to do this when you are buying your fabric – one less step to do when you get home.

Next you will sew a tube or hem into the fabric to thread the headband through. Take one piece of tulle and along the side you cut, fold the fabric over about one to one and a half inches and pin. Again this does not have to be even or perfect. You just need a tube big enough to fit around your headband. Once the fabric is all scrunched up you won’t even be able to see the sewed part.

Now sew a seam where you pinned your fabric down onto itself. I used my sewing machine. If you are using a sewing machine, use a wide zig zag stitch and go slow at first as the tulle bunches up easily. If you do not have a sewing machine just sew by hand. Once the tube is complete on the first piece of tulle, repeat with the second piece.

Thread the headband through the tube in both pieces of tulle. Scrunch it all up on the headband so it fits. Make sure both seams are underneath. Your basic veil is done.


I felt like it needed a little more pizzazz though. First I had to find something on which to balance the veil while it was being decorated. I used a beer glass. I then rummaged in my craft drawer and found some silver gemstone, crystally things. I glued a whole bunch of them on the back. I used a dot of regular Elmer’s glue on the back of each gem and then pressed it onto the tulle using my finger for support on the other side.


It was still lacking something. Back in my craft drawer I found some spray adhesive and a big jar of silver glitter. I sprayed sections of the veil with the spray adhesive and then shook glitter all over it. The result was so perfect! It was so sparkly but not too tacky at all (to me anyway).


So is it worth it? Well Jenny loved her veil and she wore it all night. She left a trail of glitter everywhere she went. We all had a fantastic time. It was probably the best bachelorette party I’ve ever been too.


The veil was really easy to make, but more importantly it was really FUN to make, especially for a crafty person like me. I think it meant more to Jenny that I made it, rather than just going out and buying a veil or something else for her to wear.

Making a veil also allows you to personalize it for the bride. You can glue whatever you want to the back of it and do all sorts of different colors. If I made one again I would like to bind the sides of the headband with ribbon so the tulle doesn’t slide off the ends and I might also try trimming the edge of the veil with lace or feather boa or something equally as fun.

Depending on how you make the veil and what supplies you have on hand and have to buy, making the veil instead of buying it can also save you some money. You can buy the bride an extra drink later that night.

I was very proud of this veil! I have two friends getting married next summer so maybe I’ll get to make one again sometime!

Friday, December 7, 2007

Peculiar Spice Company: Cheesy Chicken Soup

I discovered the Peculiar Spice Co. a few years ago at a local craft show that MIL operates called Craft Patch. There was constantly a traffic jam of people around their booth because they were giving out free samples of all their products.

Peculiar Spice Co. produces and sells mixes: soup mixes, dip mixes, sweet mixes, side dish mixes. They are located on the south side of the Kansas City Metro area in a town called Peculiar, MO. It is now obvious where they got their name.

Of course I had to sample every single product that they offered and let me tell you, their products were GOOD. Even though everything tasted so great, I never did buy anything until this year. I think it’s because the craft show was always close to the holidays and I never felt like I could spend any money on myself (even for food?!?).

Well I made up for lost time this year. I bought six of their mixes last Saturday at Craft Patch. And on Sunday I mixed up a batch of their Cheesy Chicken Soup.

To make the soup you need the following:

Cheesy Chicken soup mix
16 oz Velveeta cheese
2-3 cups cooked chicken
8 cups of water


I took the easy way out and bought canned chicken.

First combine the water, soup mix and chicken in a large pot. This soup makes 14 cups of soup so you really do need a fairly large pot. Simmer on the stove for 25 minutes then stir in the Velveeta cheese until melted. That’s it. Seriously that’s how easy it was.

And oh my goodness does it taste good. Whatever they put in that spice mix just gives it the best flavor. I wanted to gobble up the entire pot. Instead I paced myself and packaged up the leftovers to go in my freezer.

So how does this compare to other soups from a cost perspective? I thought I saved my receipt from my shopping trip so I could do this right but of course now I can’t find it anywhere. I think I can remember the costs. It shouldn’t be that hard since I only had to buy two things. Ok, the cost to make the soup is as follows:

Soup mix – $4.50
Velveeta cheese - $3.89 for a 32 oz brick and I used half of it so $1.95
12 oz can chicken $2.12
Water – negligible

Total cost - $8.57
Divide by seven, two cup servings gives us a cost of $1.22 per serving.

This is not bad at all actually. A can of Progresso or Campbell’s Chunky soup would cost around this much or more unless you caught it on super sale. The store bought version would often be less than the two cup serving as well. So if you wanted to stretch the batch of soup into 8 servings to be more comparable to the canned version, your cost would be only $1.07.

So is it worth it? I was really, really impressed with this soup. It tastes great and it was really easy to make. It would be easy to throw on the stove when you get home on a weeknight. I like to support local businesses whenever I can and I will definitely be buying from them again in the future. I am really looking forward to trying the other four mixes I have in my pantry: Chicken Enchilada soup, Mexican Fiesta soup, Hashbrown Potato soup, and Hawaiian Chicken salad. I actually bought two Cheesy Chicken soup mixes so I’ll be making this one again!

Peculiar Spice Co. does have online and phone ordering so if you are interested please check out their website.

Wednesday, December 5, 2007

Cream Cheese Frosting

This cream cheese frosting recipe is FANTASTIC. I was so excited at how great it turned out. The frosting recipe also comes from the cookbook Cupcakes! by Elinor Klivans and I made it to top my pumpkin ginger cupcakes.

Cream Cheese Frosting
Makes 3 cups

½ cup (1 stick) unsalted butter, at room temperature
6 ounces cream cheese, at room temperature
1 teaspoon vanilla extract
3 cups powdered sugar


It is important that the butter and the cream cheese come to room temperature before you begin. If you use those two ingredients straight out of the refrigerator the frosting will be lumpy and no amount of mixing will get the lumps out. Set the butter and cream cheese on the counter while you make your cake or cupcakes and by the time you’re finished they should be ready to go.

In a large bowl, using an electric mixer on low speed, beat the butter, cream cheese, and vanilla until smooth and thoroughly blended, about one minute. Stop the mixer and scrape the sides of the bowl as needed during mixing.


Add the powdered sugar, mixing until smooth for about 1 minute, then beat on medium to high speed for 1-2 minutes until whipped and creamy. The frosting is ready to use, or for flavor additions.


The best tool to use to frost a cupcake or cake is an offset spatula, as I mentioned for basic buttercream frosting. Now I have a picture of it:


This is a small one that I use for cupcakes. To frost a cupcake, scoop a big dollop of frosting out of the bowl with the spatula and plop it in the middle of the cupcake. The more the better!


Then flatten the dollop and spread the frosting around the edges of the cupcake, twirling it in your hand. You can do the same thing with a spoon if you do have or do not want to buy a special spatula. I like to leave a little bit of the cake part showing but that’s just my preference.


Voila – the perfect cupcake!


So is it worth it? This is the best frosting I’ve ever made so it’s a resounding yes for me. I swear I am never going to use frosting out of a can ever again. I can’t wait to make red velvet cupcakes to go with this frosting. And the next time I make homemade oreos I’m definitely going to use this frosting for the filling.

Monday, December 3, 2007

Pumpkin Cupcakes

I LOVE pumpkin. Pumpkin anything. Pumpkin pie, pumpkin bars, pumpkin bread, pumpkin muffins, pumpkin smoothies, you name it. So when I saw this recipe for pumpkin cupcakes I knew I had to make it for Thanksgiving. This recipe comes from the book Cupcakes! by Elinor Klivans.

Pumpkin Ginger Cupcakes
12 cupcakes

1 ½ cups unbleached all-purpose flour
¾ teaspoon baking powder
¾ teaspoon baking soda
¼ teaspoon salt
1 teaspoon ground cinnamon
1 teaspoon ground ginger
½ cup (1 stick) unsalted butter, melted and cooled slightly
1 cup sugar
1 cup canned pumpkin (not pumpkin pie filling)
3 large eggs
¼ cup (about 1 ½ oz) crystallized ginger cut into 1/8 to ¼ inch pieces

First I gather all my ingredients. Why do I do this? Because I want to make sure I really do have everything I need before I begin. It would be terrible to be in the middle of the recipe and realize you only have one egg left when you thought you had three because your husband decided to make an omelet yesterday after you left for work.


I could not find crystallized ginger so I decided to leave it out. The rest of the ingredients are common and I usually have them all on hand.

Preheat your oven to 325 degrees F and line 12 muffin cups with paper liners. I also spray my liners with non-stick spray.

Sift the flour, baking powder, baking soda, salt, cinnamon and ginger into a medium bowl and set aside. I use a sieve-strainer type thing to sift. You can also use an actual sifter (pictured below next to my bowl) but personally I hate those things so I never use it.


Next beat the melted butter, sugar and pumpkin together in a large bowl on low-medium speed until smooth. Mix in the eggs and crystallized ginger (if you were able to find it at the store).


On low speed, mix in the flour mixture until it is incorporated. The batter will be thick. In my opinion if you are not using a stand mixer I would mix the flour in by hand. You do not want to over mix the batter and I think it’s easy to do so with a hand held mixer. Over-mixing the batter will develop the gluten in the flour too much, causing the batter to become stringy and tough. This does not result in a tasty cupcake.


Fill each muffin cup with a generous ¼ cup batter. You do not have to measure this out exactly. I use a two spoon method when dipping out batter for muffins or cupcakes. Get out two of your larger spoons. Use one to scoop batter out of the bowl and make like you are going to dump it into the muffin cup. Use the other spoon to scrap the batter off the first spoon and into the muffin cup. Repeat. Just distribute the batter evenly among the 12 muffin cups.


Bake just until the tops feel firm and a toothpick inserted in the center of a cupcake comes out clean, about 25 minutes. That is what the recipe says. I ALWAYS set my timer for 2-5 minutes less than the lowest time called for in the recipe so I can check on my cupcakes or whatever I’m baking and monitor the last few minutes. Usually my baked good is done early. I’m super paranoid about burning stuff and this keeps that from happening.


Cool the cupcakes for 10 minutes in the pan. Then pop them out of the pan and onto a wire rack or paper towel and allow them to cool completely before frosting.

The best frosting for pumpkin cupcakes is cream cheese frosting! That will be a separate post this week and let me tell you – it was unbelievable.

So is it worth it? Um YES! These cupcakes turned out so good. They received rave reviews from my family on Thanksgiving. And they are made totally from scratch! I have not had a ton of luck making cupcakes completely from scratch so I was really pumped when these turned out so good. I usually use a mix and add a couple special ingredients.

If you are a fan of cupcakes, this cookbook has a ton of really great-looking recipes in it. I can’t wait to try more of them!

Monday, November 26, 2007

Buttermilk Wheat Rolls

For Thanksgiving I told my grandma I would bring homemade rolls. I'd only made homemade rolls once before and they only turned out okay. Since then though I’ve made several loaves of bread and countless pizza crusts so I figured I’d be okay. Or else I'd be running to the store for the heat 'n eat kind!

The recipe I chose is called Whole Wheat Buttermilk Rolls from the cookbook Baking by Carole Clements. I like this recipe because there’s only one rise instead of the normal two when making yeast breads.

Whole Wheat Buttermilk Rolls
Makes 12 rolls

2 teaspoons active dry yeast
¼ cup lukewarm water
1 teaspoon sugar
¾ cup lukewarm buttermilk
¼ teaspoon baking soda
1 teaspoon salt
3 tablespoons butter, at room temperature
1 ½ cups whole wheat flour
1 cup all-purpose flour
1 beaten egg, for glazing

I decided to double this recipe.

Begin by combining the yeast, water and sugar in a large bowl. Stir and leave for 15 minutes to dissolve. The yeast will make the liquid all bubbly. It's "burping" as Alton Brown would say.


Add the buttermilk, baking soda, salt and butter and stir to blend. The butter doesn’t really blend completely so just chop it up some and move on. It will be blended in when the flour is added.


Stir in the whole wheat flour. I used the paddle attachment on my stand mixer. Add just enough all-purpose flour to form a stiff dough. The recipe calls for one cup, but I used up to 1 ½ cups. At this point I switched to the dough hook attachment.


Transfer to a floured surface and knead until smooth and elastic. OR use the dough hook attachment to knead. The dough ball should come together and clean the sides of the bowl. If the dough is sticky, add more flour a little bit at a time.


Once dough is smooth and elastic, transfer to a floured surface (if you haven’t already) to shape the dough into rolls.


Divide into 3 equal parts. Roll each into a cylinder then cut each cylinder into 4 pieces.


Form the pieces into torpedo shapes (aka football shapes). Now unless you are an expert, it will be impossible to get them all the same size. And mine didn’t really look like torpedos as you can see below:


I’m not sure that it’s really necessary to form the dough into a torpedo shape. I think next time I will just make them round. Much easier!

Place on a greased baking sheet, cover and leave in a warm place until doubled in volume (about one hour). Tip: place pan over a bowl of warm water, like suggested for homemade pizza crust to help the rolls rise. Here’s what they looked like after one hour:


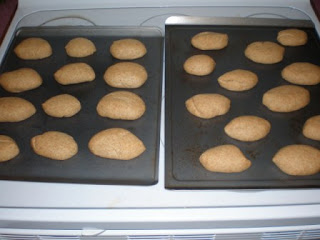
Preheat oven to 400 degrees F. Brush with the glaze. I forgot to do that part - oh well! Bake until firm, 15-20 minutes. Cool. Here’s how they turned out:


These rolls turned out really well! They looked really nice and they tasted great warm with butter. They were a hit at my grandma’s house. I thought they were really easy, especially with only one rise. I usually have all these ingredients on hand, except for buttermilk. Tip on buttermilk: if you do not have any buttermilk and your recipe calls for it, mix 1 tablespoon white vinegar with 1 cup milk and let stand for a few minutes to curdle. Use as directed for buttermilk in your recipe. I do this all the time and I can never tell a difference from real buttermilk.

I will definitely be making these again!