Monday, November 26, 2007

Buttermilk Wheat Rolls

For Thanksgiving I told my grandma I would bring homemade rolls. I'd only made homemade rolls once before and they only turned out okay. Since then though I’ve made several loaves of bread and countless pizza crusts so I figured I’d be okay. Or else I'd be running to the store for the heat 'n eat kind!

The recipe I chose is called Whole Wheat Buttermilk Rolls from the cookbook Baking by Carole Clements. I like this recipe because there’s only one rise instead of the normal two when making yeast breads.

Whole Wheat Buttermilk Rolls
Makes 12 rolls

2 teaspoons active dry yeast
¼ cup lukewarm water
1 teaspoon sugar
¾ cup lukewarm buttermilk
¼ teaspoon baking soda
1 teaspoon salt
3 tablespoons butter, at room temperature
1 ½ cups whole wheat flour
1 cup all-purpose flour
1 beaten egg, for glazing

I decided to double this recipe.

Begin by combining the yeast, water and sugar in a large bowl. Stir and leave for 15 minutes to dissolve. The yeast will make the liquid all bubbly. It's "burping" as Alton Brown would say.


Add the buttermilk, baking soda, salt and butter and stir to blend. The butter doesn’t really blend completely so just chop it up some and move on. It will be blended in when the flour is added.


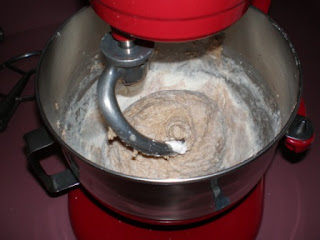
Stir in the whole wheat flour. I used the paddle attachment on my stand mixer. Add just enough all-purpose flour to form a stiff dough. The recipe calls for one cup, but I used up to 1 ½ cups. At this point I switched to the dough hook attachment.


Transfer to a floured surface and knead until smooth and elastic. OR use the dough hook attachment to knead. The dough ball should come together and clean the sides of the bowl. If the dough is sticky, add more flour a little bit at a time.


Once dough is smooth and elastic, transfer to a floured surface (if you haven’t already) to shape the dough into rolls.


Divide into 3 equal parts. Roll each into a cylinder then cut each cylinder into 4 pieces.


Form the pieces into torpedo shapes (aka football shapes). Now unless you are an expert, it will be impossible to get them all the same size. And mine didn’t really look like torpedos as you can see below:


I’m not sure that it’s really necessary to form the dough into a torpedo shape. I think next time I will just make them round. Much easier!

Place on a greased baking sheet, cover and leave in a warm place until doubled in volume (about one hour). Tip: place pan over a bowl of warm water, like suggested for homemade pizza crust to help the rolls rise. Here’s what they looked like after one hour:


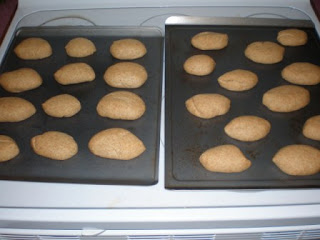
Preheat oven to 400 degrees F. Brush with the glaze. I forgot to do that part - oh well! Bake until firm, 15-20 minutes. Cool. Here’s how they turned out:


These rolls turned out really well! They looked really nice and they tasted great warm with butter. They were a hit at my grandma’s house. I thought they were really easy, especially with only one rise. I usually have all these ingredients on hand, except for buttermilk. Tip on buttermilk: if you do not have any buttermilk and your recipe calls for it, mix 1 tablespoon white vinegar with 1 cup milk and let stand for a few minutes to curdle. Use as directed for buttermilk in your recipe. I do this all the time and I can never tell a difference from real buttermilk.

I will definitely be making these again!

Friday, November 23, 2007

Cranberry Sauce

Until last year the only cranberry sauce I knew came out of a can. Turns out, homemade cranberry sauce is a snap to make.

Cranberry Sauce

12 ounces cranberries
1 cup sugar
1 cup orange juice

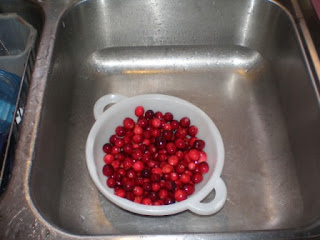
First rinse the cranberries and sort out any bad ones.


Next combine orange juice and sugar in a medium saucepan. Over medium heat, dissolve the sugar into the orange juice. You can tell the sugar is dissolved when you can't hear the sugar granules scraping on the pan when you stir. Once sugar is dissolved, dump in the cranberries.


Cook until the cranberries start to pop (about 10 minutes). You’ll be able to actually hear the popping. The cranberries will start to have cracks in them like this one:


As it cranberries break open and cook, the mixture will foam a little bit.


Remove from heat and place sauce in a bowl. Cranberry sauce will thicken as it cools.


Presto! Super simple and fast. I love my homemade cranberry sauce on rolls. If you have an extra fifteen minutes I think it’s definitely worth it to make cranberry sauce yourself rather than opening a can.

Tuesday, November 20, 2007

Turkey – Basic Cooking Instructions

In honor of Thanksgiving this week I thought it would be appropriate to write about how to cook a basic turkey. It’s actually fairly easy, it just takes a long time. I wish I could post pictures but we are not making a turkey this year. My husband LOVES to make the turkey but this year we decided to go to my grandparents’ house instead. So no pictures just some basic tips and instructions.

First you need to buy a turkey. Either fresh or frozen will work fine but if you buy a frozen turkey make sure you buy it several days before you plan to cook it. You should buy 1 to 1 ½ pounds per person you are serving.

A frozen turkey should be thawed in its package in the refrigerator. Allow one day for every 4-5 pounds. If you haven’t purchased your turkey yet and you plan to cook it on Thanksgiving Day, you need to buy a fresh turkey because you do not have enough time to thaw a frozen one.

Place the frozen turkey on a platter or in a dish to catch any juices. The last thing you want to do on Thanksgiving morning is clean turkey juice out of your refrigerator. Place the turkey on the lowest shelf possible, that way if juice does leak out it doesn’t leak all over everything on every shelf.

To begin preparing the turkey on Thanksgiving morning, begin by washing it. With the turkey in the sink, remove the wrapper and the package from inside the cavity. Although if you cook the turkey with the package inside I don’t think anything bad will happen because my husband did this the first time he made a turkey. We found the package when we were carving it – oops! Rinse the turkey with cold water, both inside and out. Let all the water drain out and off of the turkey and pat it dry with paper towels.

The next few steps can be modified to suit your tastes. This is just the way my husband likes prepare the turkey. Rub the outside of the turkey with a stick of butter. Stuff the inside of the turkey with citrus fruits – orange, lemon and lime halves – white onion quarters, celery, fresh poultry herbs and another stick of butter. Tie the legs of the turkey together to keep the all those goodies inside.

We prefer to use a disposable roasting pan and an oven bag to cook the turkey as it makes clean up extremely easy. Buy your roasting pan at the same time that you buy your turkey and make sure that your turkey will fit in the roasting pan!

Open the oven bag and toss in a tablespoons of flour. Hold the bag closed and shake to distribute the flour. The Reynolds website says this helps keep the bag from bursting. Then place the turkey inside the oven bag and set the turkey in the roasting pan. We like to cook our turkey upside down with the breast on the bottom. This keeps the meat really moist and eliminates the need for basting. Some people do not like to cook the turkey upside down because the turkey is not as pretty and brown when it is finished. I however am more concerned with the taste than the appearance so it’s upside down for us.

Now it is ready to bake. Put the turkey in a preheated 325 degree F oven and bake according to the following schedule for stuffed turkeys:

10-18 lbs 3.75 – 4.5 hours
18-22 lbs 4.5 – 5 hours
22-24 lbs 5 - 5.5 hours
24-30 lbs 5.5 – 6.25 hours

Unstuffed turkeys will not take as long. Check on your turkey periodically and then at the beginning of the time range start testing the temperature. A turkey is done when it is browned and a thermometer stuck in the thigh reads 165 degrees F.

Remove turkey from the oven and allow it to rest for at least 30 minutes. Now is the time to bake all your side dishes. After the turkey has rested you can carve and enjoy! I have absolutely no tips on carving a turkey. FIL always does it. An electric knife helps but that’s all I know! When dinner is over you can just throw out the entire roasting pan and oven bag with all the scraps left in it.

Here’s a really funny practical joke you can play on the host and hostess at your Thanksgiving dinner. Bring a cooked Cornish hen with you to dinner but keep it hidden. Have someone distract the host and hostess while they turkey is being carved. Place the Cornish hen inside the turkey’s cavity and then say, “You had a pregnant turkey!” and point out the Cornish hen. Have your camera ready to take a picture of their shocked faces because it will take them a minute or two to realize that a. turkeys lay eggs and do not have live babies, b. if a turkey was indeed pregnant, the baby would not be headless and defeathered inside its stomach. Trust me I know. I’ve had this joke played on me and I’ve never laughed so hard in all my life. Good times, good times.

Happy Thanksgiving!!!! Tomorrow is homemade cranberry sauce.

Monday, November 19, 2007

Croutons

Over the summer we had a lot of barbeques and grilled out a lot. So I have had a lot of leftover buns in my freezer since the summer ended. I am sick of them taking up space in my freezer but I hate to just throw them out, so I thought I could try to make croutons out of them.

I’ve never made croutons before so I first consulted Betty Crocker to see how to make them. Betty said to toast them in a pan on top of the stove. I wasn’t really feeling like standing over the stove the whole time. I looked up a crouton recipe on All Recipes to see if I could bake them instead. I found this basic recipe:

Croutons

15 slices bread
¼ cup butter
2 teaspoons garlic salt (optional)

Preheat oven to 350 degrees F. Brush bread on both sides with melted butter. Cut bread into small cubes. Sprinkle with garlic salt if desired. Arrange cubes on an ungreased cookie sheet.

Bake at 350 degrees F for 15 minutes or until browned. Let cool. Store croutons in a covered container or plastic bag. Serve in soups or salads.

Well I don’t have bread I have buns. I did not use all of these buns by the way.


Brushing each one with butter sounds like it will take too long (this from the girl who spent like 45 minutes cutting up marshmallows yesterday – ha). So here’s what I did: I cut up about 4-5 hamburger buns and 2 hot dog buns into one inch cubes. I tossed them all in a big bowl.


I melted a stick of margarine in the microwave and drizzled it on top.


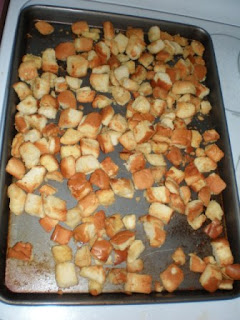
I stirred it all up. Then I sprinkled a teaspoon of garlic salt on top and stirred it up again. I spread all the future croutons on a jelly roll pan


I baked them for 15 minutes, stirring every 5 minutes.


I allowed them to cool completely before storing. Make sure you allow croutons to cool completely or else they will generate moisture in the container and spoil quicker.

So is it worth it? Well these aren’t the BEST croutons I ever tasted in my life, but they aren’t bad! It is a great way to use up old buns or bread. Actually I’ve been snacking on them all night; grabbing one each time I walk by the stove. I might end up eating them all before they actually make it into a salad or bowl of soup.

I will make these again. I might try some different seasonings like dried basil or oregano for Italian croutons.

Sunday, November 18, 2007

Homemade Marshmallows


A few days ago I posted about homemade hot chocolate mix. I love to put marshmallows in my hot chocolate. One big, giant one. That got me thinking, how hard is it to make your own marshmallows?

I’ve actually investigated this before briefly. What I found was a Martha Stewart recipe involving candy thermometers. At the time it seemed a little too complicated for me.

The other day I found what appeared to be a much simpler recipe on Slashfood. Although I was still a bit intimated, I decided to give it a whirl! The recipe is as follows:

Homemade Marshmallows
Approximately 40 large marshmallows

0.75 oz unflavored gelatin (3 envelopes of Knox gelatin)
½ cup cold water
2 cups granulated sugar
2/3 cup light corn syrup
¼ cup water
¼ teaspoon salt
1 tablespoon vanilla extract

Line a 9x9 inch pan with plastic wrap and lightly oil. Set aside. In the bowl of an electric stand mixer, sprinkle gelatin over ½ cup cold water. Soak for about 10 minutes.

Meanwhile, combine sugar, corn syrup and ¼ cup water in a small saucepan. Bring the mixture to a rapid boil and boil hard for 1 minute. Pour the boiling syrup into the soaked gelatin and turn on the mixer, using the whisk attachment, to high speed. Add the salt and beat for 12 minutes. After 12 minutes, add the vanilla extract and beat to incorporate. Scrape marshmallow into the prepared pan and spread evenly (grease the spatula or your hands). Take another piece of lightly oiled plastic wrap and press lightly on top of the marshmallow, creating a seal. Let mixture sit for a few hours, or overnight, until cooled and firmly set.

In a shallow dish, combine equal parts cornstarch and confectioner’s sugar. Remove marshmallow from the pan and cut into equal pieces with scissors or a chef’s knife. Dredge each piece of marshmallow in the confectioner’s sugar mixture. Store in an airtight container.

Ok seems simple enough. I start by gathering the ingredients:


Then I put the ½ cup cold water into my mixing bowl and then pour three packs of the gelatin over the top of it. I do not stir it up.


In my saucepan I add the sugar, corn syrup and ¼ cup cold water. Tip: when measuring sticky ingredients like honey, molasses or corn syrup, spray the inside of the measuring cup with non-stick spray first. The sticky ingredient will slide right out.


I flip the heat on the burner to high and start stirring it all up. Once everything is mixed up I leave it alone to prepare my pan. I do not have a 9x9 pan so I use my 8x8 pan. I put two layers of plastic wrap on the inside (one going each way) and then spray it down with non-stick spray.


Back to my saucepan. I stir the ingredients frequently and they come to a boil rather quickly. I set my kitchen timer for a minute and let the liquid boil rapidly.


Once the timer goes off I immediately dump the liquid into my mixer bowl on top of the gelatin and snap it onto my mixer. I put on the whisk attachment, raise the bowl and flip it to a high speed. Steam starts pouring out of the mixer bowl. Hahahaha. It looks like some sort of special effect. I quickly measure and toss in the salt while the mixer is running.


Now I set my timer for 12 minutes and wait. Now is a good time to clean up your kitchen! Here is what the mixture looked like as it was mixing:


Once 12 minutes were up the mixture had grown a lot and was shiny and white. Out of paranoia I gave my pan another little squirt of non stick spray, then I sprayed my spatula and proceeded to scrape the marshmallow mixture out of the bowl and into my pan. It comes out fairly easily and fills the pan up to the top. Not much spreading is actually needed.


I place the last piece of oiled plastic wrap across the top and seal. I set this aside to set overnight. Then I had to lick the spatula and sure enough, it tastes like marshmallow fluff! Mmmmm.

Now this bowl looks like it’s going to be a huge pain to clean, but it actually wasn’t. Give it 10 minute soak in super hot water and all the marshmallow stickiness will melt away.


The next afternoon I am ready for the next step. I remove the top layer of plastic wrap and then lift out the entire slab of marshmallow onto my cutting board. I peel off the plastic wrap from the bottom of the marshmallow square. The marshmallow slab is kind of sticky, but it pulls away from whatever it gets stuck to pretty easily.


Okay, now for the cutting. The directions said to use scissors but for some reason I think a knife will work better. Wrong! I try to cut it with the biggest knife I have and it barely leaves a dent. The marshmallow just springs back into place. Okay I guess I’m using my kitchen shears. I cut the slab into strips, then cut the strips into chunks, then cut each chunk in half to make cubes.


To keep from sticking to each other, the marshmallows must be dredged in a corn starch and confectioner’s sugar mixture. The directions say to use equal parts so I mix up two tablespoons of each in a little bowl. I dredge each marshmallow in the powdery mixture and then toss them into a big plastic container.


I do the whole process of cutting and dredging in batches and it takes a little while to get through them all. I end up with quite a few marshmallows in the end! I tasted one and they taste pretty darn good!


Overall I think these were easy and fun to make. I think you pretty much have to have a stand mixer though. Mixing up the marshmallow batter was super simple. The cutting and the dredging part took awhile but was not difficult.

Next time I will use a larger pan so that the marshmallow slab is not as thick. I think this will make the cutting process easier and faster.

The comments on Slashfood for this recipe had a lot of great suggestions for modifications such as using mint extract instead of vanilla or rolling the marshmallows in chopped up nuts or cookies for extra flavor. I also read that it is possible to spread the marshmallow batter in a jelly roll pan and then use cookie cutters to cut marshmallows into fun shapes.

I don’t know if I will make homemade marshmallows all the time, but they are definitely fun for special occasions and holidays. Pair a jar of homemade marshmallows with a jar of homemade hot chocolate mix as a gift for a friend or family member this holiday season.

Thursday, November 15, 2007

Hot Chocolate


Once when I was going through a rough patch in my life, a friend of mine brought over a jar of homemade hot chocolate mix. It was just the right gift for me at the time. It showed me she cared without her spending a ton of time or money and hot chocolate can be very comforting.

She included a card with the jar that told how to make up a cup using the mix. On the back of the card was the recipe for making the mix. How thoughtful! Now I can refill the mix whenever I run out.

As we are going into the cold months and also the holiday season, I thought it would be appropriate to post this recipe. Make it for yourself to use at home, or put it in a pretty jar or container as a small gift for a friend or a nice hostess gift if you are going to a party.

Homemade Hot Chocolate Mix

3 cups nonfat dry milk
2 cups confectioners’ sugar
1 ½ cups Dutch processed cocoa powder
1 ½ cups white chocolate chips
¼ teaspoon salt

Mix all ingredients.

To make a cup of hot chocolate using the mix, stir 1/3 cup mix into 1 cup hot milk or water. Top with whipped cream or marshmallows as desired. Personally I like to put one giant marshmallow on top.

I love this hot chocolate in the winter. I keep a stash of it in my cube at work to drink in the afternoons. It also makes a really nice, easy and inexpensive gift for someone. Pair the mix with a cute mug and you are all set! Make sure you include a card or label the mix with instructions on how to make a cup of hot chocolate using the mix. Also include the recipe for making the mix. I’m sure your friend or family member will like the mix so much they will need a refill!

Wednesday, November 14, 2007

Compost Part I


My FIL retired this summer. Since he retired he has been busy with so many projects that I don’t know how he ever had time to work for the past 30 years.

One of the projects he wants to start planning for is a big vegetable garden for next year. He wants to have it at our house because we have a lot more space in our backyard (we live on an acre). My husband and I are all for a garden. We’ve wanted to plant one for awhile but we’ve never had the time. FIL has offered to come over and help take care of it next summer. Since my MIL knows how to can vegetables, this could be a big money-saver for all of us as well as a fun and interesting hobby.

To help with the garden, we talked about starting a compost bin. For those who don’t know what a compost bin is, here is the definition from Wikipedia: Compost is the aerobically decomposed remnants of organic materials. Compost is used in gardening and agriculture as a soil amendment, and commercially by the landscaping and container nursery industries.

Basically you get a big bin and throw a bunch of biodegradable stuff in it, which decomposes, producing this dark, nutrient-rich, soil-looking fertilizer that you spread on your garden.

I’ve never had a compost bin before. I have a vague memory of my Girl Scout troop leader having one in her backyard so we could learn about it. All I remember is going out to her back yard and throwing some vegetable scraps inside. It seems like a great idea. Having a compost bin is very environmentally-friendly in that it is a way to recycle your food scraps from the kitchen thus reducing landfill waste, and it produces organic fertilizer for your garden, eliminating the need for chemical fertilizers.

The first step in this process is research! I’ve been doing some research online lately to see how to start a compost bin in your backyard. I’ve found a couple informative websites. Compost Guide offers a great explanation of pretty much everything you need to know about composting from the decomposition process to things you can put in your compost to compost site selection. How to Compost also offers some great information.

After reading through these websites, I realize that (obviously) the first thing I need for a compost bin is a bin to put everything in. You can purchase a compost bin or you can build one. Click here to see some options of compost bins you can purchase. They seem a little pricy to me to be honest. Knowing my FIL, he will want to build one. Bluegrass Gardens has plans for building compost bins. I like the Wood 3-Bin Compost Unit. Three bins would allow me to have compost going in different stages, ensuring that I always have a supply of compost ready or almost ready. It will also allow me to turn the compost easier, in that I can shovel it from one bin to another empty bin.

Compost Guide says that compost can be passive or actively managed. The more actively you manage the compost, the quicker it will decompose. By having 3 sections to my compost bin, I can have one active pile and one more passive pile.

I’d like to have the compost bin finished within the next couple of weeks so that I can store my leaves in there and use them in the compost in the spring. They would serve as a passive compost through the winter, then I can convert them to a more active compost in the spring. My lawn is currently a SEA of leaves. There are leaves everywhere! According to Compost Guide, I can shred and store these leaves all winter and then use them in the compost in the spring. CG says that some decomposition may occur, but not a significant amount.

Next step is to talk to my FIL and see if he is willing to help me build the Wood 3-Bin Compost Unit. Fingers crossed!

Monday, November 12, 2007

Cornbread!


It's been awhile but I'm back! Posting everyday was getting a little overwhelming so I may only post every other day for awhile. It's been getting cold in the midwest and that means lots of soups and chili! It also means cornbread, which I love with everything.

I always make my cornbread from scratch. It is SO easy. It only takes a few more minutes than making it from a box of Jiffy. This recipe comes off the side of the cornbread container:

Easy Corn Bread
9 servings

1 1/4 cups all purpose flour
3/4 cup corn meal
1/4 cup sugar
2 teaspoons baking powder
1/2 teaspoon salt (optional)
1 cup skim milk
1/4 cup vegetable oil
1 egg, beaten

Preheat oven to 400 degrees F. Grease 8 or 9 inch pan. Combine dry ingredients. Stir in milk, oil and egg, mixing just until dry ingredients are moistened. Pour batter into prepared pan. Bake 20-25 minutes or until light golden brown and toothpick inserted in center comes out clean.

I usually use a square glass pan to make this cornbread. I also make corn muffins. The recipe is the same, just pour the batter into a 12 cup muffin pan instead. Bake for 15-20 minutes. Corn muffins are great for freezing as well. I wrap them up 2 at a time that way I can pull out a 2 pack to go with my lunch or dinner.

I like to make my cornbread from scratch because I know exactly what's in it. These are the ingredients in a Jiffy mix: wheat flour, corn meal, sugar, lard, leavening (baking soda, sodium acid pyrophosphate, monocalcium phospate), contains 2% or less of the following: salt, niacin, reduced iron, thiamine mononitrate, riboflavin, folic acid. These are the ingredients in homemade cornbread: flour, corn meal, sugar, baking powder, salt, milk, vegetable oil, egg. Which would you rather eat?

I do use mixes sometimes, but I prefer to make stuff from scratch when possible. I keep a container of cornmeal in my freezer and I almost always have the rest of the ingredients on hand so I can make corn bread whenever I want. I don't have to remember to buy the little mixes.

I don't know that it's necessarily cheaper than using a Jiffy mix because when Jiffy mixes are on sale you can get them for 3 for $1.00 sometimes.

I like homemade cornbread because it's more natural, easy and it tastes fantastic! I hope you will try making it from scratch sometime too so you can see how easy it is.